

How to Drill Into Concrete
Whether you're hanging a shelf, installing a new fixture, or headed to today’s jobsite, drilling into concrete is a fundamental skill everyone should know. In this guide, we'll walk you through the entire process, a few best practices, and the tools you need to not only get the job done — but get it done right.
Your Step-By-Step Guide for Drilling Into Concrete
Step 1: Know the Material You're Working With
First things first, you want to identify what type of concrete surface you're working with. Cement compositions can vary, which makes drilling into concrete tougher — or easier — as the project moves forward. A mix with more aggregate (like sand, gravel, etc.) wears out bits faster, which makes it more difficult to drill.
Step 2: Make Sure You Have the Right Tools
Knowing what type of concrete you’re drilling into makes it far easier to choose the right tools for the job. Generally speaking, here’s what you need in your toolbox:
- Hammer Drill: Unlike basic Power Drills, which range from 450-500 watts, Hammer Drills typically sit around 1500 watts. You need this extra power when drilling through concrete. We recommend using a hammer drill with multiple speed settings and keeping the RPM on the lower side. You’ll still have enough torque to drill into concrete, and you’ll do so without damaging the surface area.
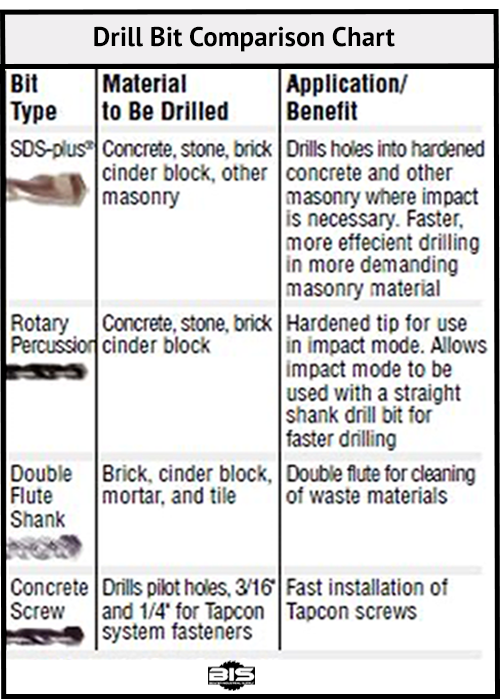
- Carbide-Tipped Drill Bits: Standard drill bits won't cut it when dealing with concrete, so make sure you have some carbide-tipped drill bits in your toolbox.
- Safety Gear: Breathing concrete dust is dangerous, and getting it in your eyes is downright annoying. Make sure to wear safety glasses, a dust mask, and consider investing in a HEPA-Certified Dust Extractor for larger jobs.
- Measuring Tools: Precision is key when drilling into concrete. At a minimum, your toolbox should have a measuring tape, level, and a pencil to accurately mark the drilling points.

Step 3: Prep the Surface
Before you start drilling, get your space in order. Vacuum any dust or cobwebs and wash down the surface so it’s free of debris. A clean slate sets the stage for a smoother drilling experience. Remember, don’t drill where there might be pipes, wiring, or ductwork behind the concrete.
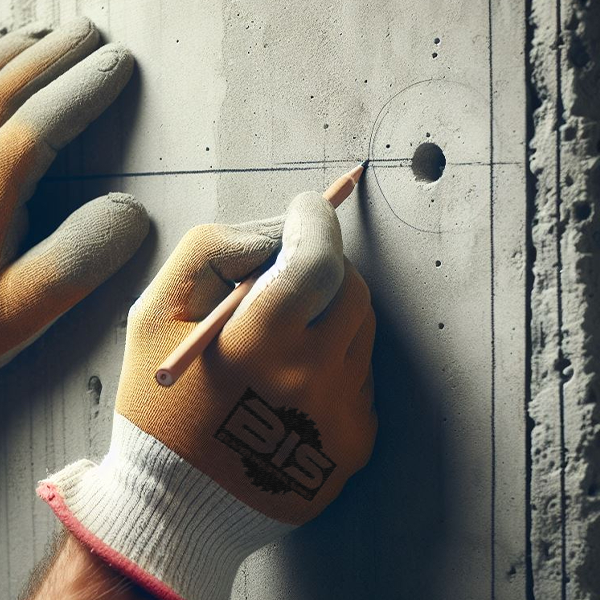
Step 4: Mark the Concrete
The saying “measure twice, drill once” is extra important when working with concrete. So, grab your tape measure and figure out where you want to drill. Use a carpenter's pencil to mark the spot on the concrete and double-check your measurements. If you're hanging something, hold it up to make sure the holes line up. You want your installation to sit level against the concrete.
Step 5: Get Your Bits in Order
Now, figure out the drill bits you'll need. If you’re using concrete screws, the right-sized bit is usually included in the packaging. If you’re not, a 3/16-inch bit works for 1/4-inch screws and a 5/32-inch bit works for 3/16-inch screws. Just remember to keep some spare bits handy, as they’ll wear out faster when drilling into cement.

Step 6: Drill the Hole
Assume a stable stance with your feet shoulder-width apart. Grip the drill with one hand a use your non-grip hand to brace the back of the drill (if there’s no auxiliary handle). Position the drill tip on the marked spot and keep it perpendicular as you drill.
Here’s some tips to keep in mind:
- Start slow for better control, then speed up as the hole forms.
- Drill forward with steady, light pressure – no need to force it.
- Stop when you hit the desired depth.
- Clear away the concrete dust using a sweep, blow, or vacuum.
Step 7: Secure Your Anchor (If Needed)
If your screw's threads won't grip, you can always try to drill a new hole. If you can’t do that, you’ll want to use an anchor. Widen the hole slightly to fit the anchor, remove any dust, and press the anchor in until it's flush with the surface. If it’s not perfectly flush, a gentle tap from a hammer can help.
Best Practices to Follow When Drilling Into Concrete
Before you go, let’s do a quick recap. Here are a few best practices to keep in mind:
- Choose the Right Drill Bit: Make sure to use carbide-tipped masonry drill bits, which are specifically designed to handle the hardness of concrete.
- Take Breaks: Concrete drilling generates heat. Periodically taking a break allows the drill bit to cool down, preventing overheating.
- Use a Depth Stop: Most hammer drills come with a depth stop feature. This is helpful if you’re drilling more than one hole, as it’ll be much easier to get a consistent hole depth.
- Work Slow and Steady: Applying excessive force can overwork your hammer drill. Keep the RPM low and allow the drill bit to work at its own pace.
- Keep Tools Sharp: Replace worn-out drill bits. The sharper your bit, the cleaner the hole (and you’ll have fewer accidents!)
- Clean as You Go: Clear away dust and debris to prevent your drill bit from getting jammed.
Remember to take your time, be patient, and prioritize safety. Don’t have the right tools for the job? Don’t stress. Shop our selection of concrete-specific drills and masonry bits at BIS!